Zend Framework提供了一个单独的组件zend-form来加速表单创建和验证过程。它连接模型和视图层。它提供了一组表单元素,可以从预定义的模型创建完整的html表单,提供InputFilter类以根据表单验证模型,还提供了将数据从表单绑定到模型的选项,反之亦然。
安装表单组件
Zend表单组件可以使用Composer命令安装,如下所示:
composer require zendframework/zend-form
Zend表单框架具有三个子组件来管理表单。它们如下文详细解释-
- 元素-用于定义映射到模型属性的单个html输入控件。
- Fieldset-用于以嵌套方式对元素和其他字段集进行分组。
- 表单-用于创建html表单,并由元素和字段集组成。
Zend表单通常在module // src / Form目录下创建。
例
现在让我们创建一个简单的表单,将书添加到数据库中。为此,我们应遵循以下步骤-
步骤1:建立BookForm
在* myapp / module / Tutorial / src / Form”目录下创建“ BookForm.php”。在文件中添加以下更改-
<?php
namespace Tutorial\Form;
use Zend\Form\Form;

class BookForm extends Form {

   public function __construct($name = null) {
      parent::__construct('book');
      $this->add(array(
         'name' => 'id',
         'type' => 'Hidden',
      ));
      $this->add(array(
         'name' => 'author',
         'type' => 'Text',
         'options' => array(
            'label' => 'Author',
         ),
      ));
      $this->add(array(
         'name' => 'title',
         'type' => 'Text',
         'options' => array(
            'label' => 'Title',
         ),
      ));
      $this->add(array(
         'name' => 'submit',
         'type' => 'Submit',
         'attributes' => array(
            'value' => 'Go',
            'id' => 'submitbutton',
         ),
      ));
   }
}的表格类提供了一个附加的方法来映射模型和与其对应的形式的信息。我们通过扩展Form类创建了BookForm,并添加了Book模型的表单详细信息。
步骤2:更新书籍模型Book.php
使用以下指定的过滤器和验证更新模型“ Book” –
<?php
namespace Tutorial\Model;
use Zend\InputFilter\InputFilterInterface;
use Zend\InputFilter\InputFilterAwareInterface;
use Zend\InputFilter\InputFilter;

class Book implements InputFilterAwareInterface {
   public $id;
   public $author;
   public $title;
   protected $inputFilter;
   public function setInputFilter(InputFilterInterface $inputFilter) {
      throw new \Exception("Not used");
   }
   public function getInputFilter() {
      if (!$this->inputFilter) {
         $inputFilter = new InputFilter();
         $inputFilter->add(array(
            'name' => 'id',
            'required' => true,
            'filters' => array(
               array('name' => 'Int'),
            ),
         ));
         $inputFilter->add(array(
            'name' => 'author',
            'required' => true,
            'filters' => array(
               array('name' => 'StripTags'),
               array('name' => 'StringTrim'),
            ),
            'validators' => array(
               array(
                  'name' => 'StringLength',
                  'options' => array(
                     'encoding' => 'UTF-8',
                     'min' => 1,
                     'max' => 100,
                  ),
               ),
            ),
         ));
         $inputFilter->add(array(
            'name' => 'title',
            'required' => true,
            'filters' => array(
               array('name' => 'StripTags'),
               array('name' => 'StringTrim'),
            ),
            'validators' => array(
               array(
                  'name' => 'StringLength',
                  'options' => array(
                     'encoding' => 'UTF-8',
                     'min' => 1,
                     'max' => 100,
                  ),
               ),
            ),
         ));
         $this->inputFilter = $inputFilter;
      }
      return $this->inputFilter;
   }
   public function exchangeArray($data) {
      $this->id = (!empty($data['id'])) ? $data['id'] : null;
      $this->author = (!empty($data['author'])) ? $data['author'] : null;
      $this->title = (!empty($data['title'])) ? $data['title'] : null;
   }
}每个模型都应实现InputFilterAwareInterface。InputFilterAwareInterface提供了两个方法setInputFilter()和getInputFilter()。
getInputFilter用于获取模型的验证详细信息。Zend框架提供了一组丰富的过滤器和验证器来验证表单。书籍模型中使用的一些过滤器和验证器如下-
- StripTags-删除不需要的HTML。
- StringTrim-删除不必要的空格。
- StringLength验证程序-确保用户输入的字符数不超过指定的限制。
步骤3:更新BookTable类
包括saveBook方法以将书添加到数据库。
BookTable.php
<?php
namespace Tutorial\Model;
use Zend\Db\TableGateway\TableGatewayInterface;

class BookTable {
   protected $tableGateway;
   public function __construct(TableGatewayInterface $tableGateway) {
      $this->tableGateway = $tableGateway;
   }
   public function fetchAll() {
      $resultSet = $this->tableGateway->select();
      return $resultSet;
   }
   public function getBook($id) {
      $id  = (int) $id;
      $rowset = $this->tableGateway->select(array('id' => $id));
      $row = $rowset->current();
      if (!$row) {
         throw new \Exception("Could not find row $id");
      }
      return $row;
   }
   public function saveBook(Book $book) {
      $data = array (
         'author' => $book->author,
         'title'  => $book->title,
      );
      $id = (int) $book->id;
      if ($id == 0) {
         $this->tableGateway->insert($data);
      } else {
         if ($this->getBook($id)) {
            $this->tableGateway->update($data, array('id' => $id));
         } else {
            throw new \Exception('Book id does not exist');
         }
      }
   }
}
步骤4:更新TutorialController类
在教程控制器中添加新的动作addAction – myapp / module / Tutorial / src / Controller / TutorialController.php。
public function addAction() {
   $form = new BookForm();
   $form->get('submit')->setValue('Add');
   $request = $this->getRequest();
   if ($request->isPost()) {
      $book = new Book();
      $form->setInputFilter($book->getInputFilter());
      $form->setData($request->getPost());
      if ($form->isValid()) {
         $book->exchangeArray($form->getData());
         $this->bookTable->saveBook($book);

         // Redirect to list of Tutorial
         return $this->redirect()->toRoute('tutorial');
      }
   }
   return array('form' => $form);
}所述的addAction方法执行以下的处理-
- 获取请求对象。
- 检查请求的http方法是否为post方法。
- 如果请求的http方法不是post,则仅呈现模板add.phtml
- 如果请求的http方法不是post,则它将设置inputfilter,获取请求数据并将其设置到inputfiler中。
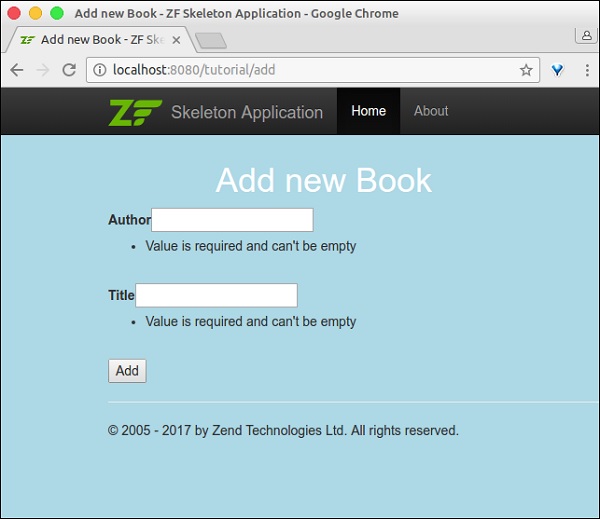
- 使用Form类的isValid()方法检查表单是否有效。
- 如果表单无效,它将再次呈现模板add.phtml
- 如果该表格有效,它将把书保存到数据库中并重定向到主页。
步骤5:添加add.phtml模板
创建模板– myapp / module / Tutorial / view / tutorial / tutorial / add.phtml下的add.phtml
Add.phtml
<?php
$title = 'Add new Book';
$this->headTitle($title);
?>
<h1><?php echo $this->escapeHtml($title); ?></h1>
<?php
if(!empty($form)) {
   $form->setAttribute('action', $this->url('tutorial', array('action' => 'add')));
   $form->prepare();
   echo $this->form()->openTag($form);
   echo $this->formHidden($form->get('id'));
   echo $this->formRow($form->get('author'))."<br>";
   echo $this->formRow($form->get('title'))."<br>";
   echo $this->formSubmit($form->get('submit'));
   echo $this->form()->closeTag();
} 在这里,我们使用Form实例$ form渲染书籍表单。
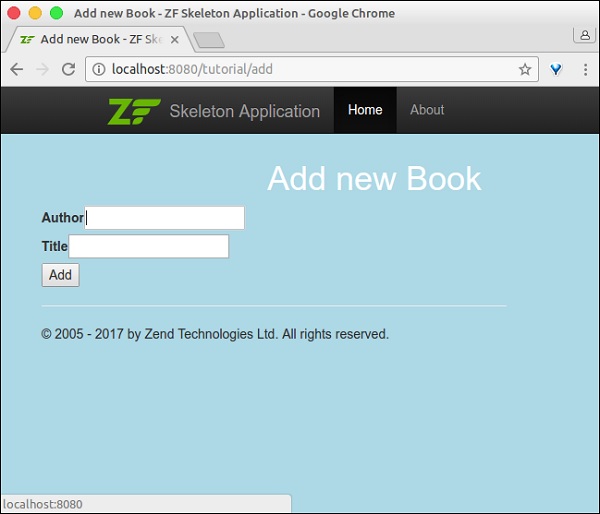
步骤6:运行应用程序
现在,我们可以运行应用程序– http:// localhost:8080 / tutorial / add。
表格页

验证错误页面
作者:terry,如若转载,请注明出处:https://www.web176.com/zendframework/280.html
 支付宝
支付宝  微信
微信