分享下AngularJS 使用 Bootstrap 并使用包含文件功能。编辑列表,然后保存数据,一起看下DEMO:
<!DOCTYPE html>
<html>
<head>
<meta charset="utf-8">
<link rel="stylesheet" href="//apps.bdimg.com/libs/bootstrap/3.3.4/css/bootstrap.min.css">
<script src="https://cdn.staticfile.org/angular.js/1.4.6/angular.min.js"></script>
</head>
<body ng-app="myApp" ng-controller="userCtrl">

<div class="container">
  <div ng-include="'myUsers_List.htm'"></div>
  <div ng-include="'myUsers_Form.htm'"></div>
</div>

<script>
angular.module('myApp', []).controller('userCtrl', function($scope) {
	$scope.fName = '';
	$scope.lName = '';
	$scope.passw1 = '';
	$scope.passw2 = '';
	$scope.users = [
		{id:1, fName:'Hege',lName:"Pege" },
		{id:2, fName:'Kim',lName:"Pim" },
		{id:3, fName:'Sal',lName:"Smith" },
		{id:4, fName:'Jack',lName:"Jones" },
		{id:5, fName:'John',lName:"Doe" },
		{id:6, fName:'Peter',lName:"Pan" }
	];
	$scope.edit = true;
	$scope.error = false;
	$scope.incomplete = false;
	$scope.editUser = function(id) {
	  if (id == 'new') {
		$scope.edit = true;
		$scope.incomplete = true;
		$scope.fName = '';
		$scope.lName = '';
		} else {
		$scope.edit = false;
		$scope.fName = $scope.users[id-1].fName;
		$scope.lName = $scope.users[id-1].lName;
	  }
	};

	$scope.$watch('passw1',function() {$scope.test();});
	$scope.$watch('passw2',function() {$scope.test();});
	$scope.$watch('fName',function() {$scope.test();});
	$scope.$watch('lName',function() {$scope.test();});

	$scope.test = function() {
	  if ($scope.passw1 !== $scope.passw2) {
		$scope.error = true;
		} else {
		$scope.error = false;
	  }
	  $scope.incomplete = false;
	  if ($scope.edit && (!$scope.fName.length ||
		!$scope.lName.length ||
		!$scope.passw1.length || !$scope.passw2.length)) {
		$scope.incomplete = true;
	  }
	};
})
</script>

</body>
</html>
其中myUsers_List.htm代码:
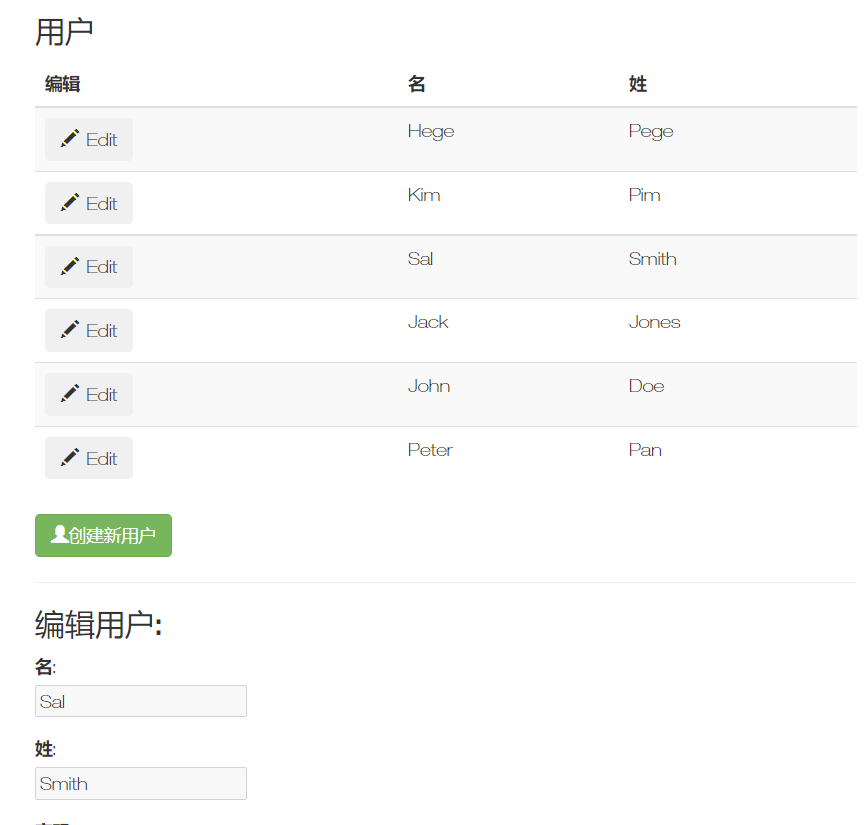
<h3>用户</h3>
<table class="table table-striped">
<thead><tr>
<th>编辑</th>
<th>名</th>
<th>姓</th>
</tr></thead>
<tbody><tr ng-repeat="user in users">
<td>
<button class="btn" ng-click="editUser(user.id)">
<span class="glyphicon glyphicon-pencil"></span> Edit
</button>
</td>
<td>{{ user.fName }}</td>
<td>{{ user.lName }}</td>
</tr></tbody>
</table>myUsers_Form.htm代码:
<button class="btn btn-success" ng-click="editUser('new')">
<span class="glyphicon glyphicon-user"></span>创建新用户
</button>
<hr>

<h3 ng-show="edit">创建新用户:</h3>
<h3 ng-hide="edit">编辑用户:</h3>

<form class="form-horizontal">
  <div class="form-group">
    <label class="col-sm-2 control-label">名:</label>
    <div class="col-sm-10">
    <input type="text" ng-model="fName" ng-disabled="!edit" placeholder="名">
    </div>
  </div>
  <div class="form-group">
    <label class="col-sm-2 control-label">姓:</label>
    <div class="col-sm-10">
    <input type="text" ng-model="lName" ng-disabled="!edit" placeholder="姓">
    </div>
  </div>
  <div class="form-group">
    <label class="col-sm-2 control-label">密码:</label>
    <div class="col-sm-10">
    <input type="password" ng-model="passw1" placeholder="密码">
    </div>
  </div>
  <div class="form-group">
    <label class="col-sm-2 control-label">重复密码:</label>
    <div class="col-sm-10">
    <input type="password" ng-model="passw2" placeholder="重复密码">
    </div>
  </div>
</form>

<hr>
<button class="btn btn-success" ng-disabled="error || incomplete">
<span class="glyphicon glyphicon-save"></span>保存
</button>
预览看下效果:

大家快试试吧!
作者:terry,如若转载,请注明出处:https://www.web176.com/angularjsex/6548.html
 支付宝
支付宝  微信
微信